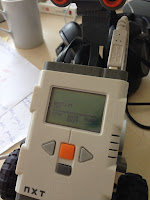
[LEGO nxt] Install the Enhanced NXT firmware and Upload the OSEK excutable file with Ubuntu 64bits 14.04 in 2015
This tutorial is referred from Install the Enhanced NXT firmware on NXT.
I think this is the critical part to capture the idea from the tutorial for Windows.
I have tried many ways to conquer the problem of libnxt3.0, however, I still have some problems on the compilation of fwflash or something else.
Though the tutorial for Windows is doable, my preference is to build up everything with Linux environment.
Fortunately, I notice that NxTTool in the tutorial for Windows is really powerful. We can handle the firmware updating by using NxTTool in Linux as well!
I also refer to this Japanese Blog, which inspire me a lot.
As usual, install the required packages:
Instead of using libnxt to do the uploading, here I follow that JP Blog to get the latest version of bricxcc: (The url in blog is not available any more.)
http://sourceforge.net/projects/bricxcc/files/bricxcc_source/bricxcc%203.3.7.19/bricxcc_src_33719.zip/download
To test your NxTTool, please use the following command:
Then download the enhanced version of NxT firmware and store with NxTTool:
To install the firmware, type the command below, where “lms_arm_nbcnxc_1xx.rfw” is the filename that you downloaded previously.
For example:
Then now you can go back to the OSEK build tree which is mentioned in the previous article:

I think this is the critical part to capture the idea from the tutorial for Windows.
I have tried many ways to conquer the problem of libnxt3.0, however, I still have some problems on the compilation of fwflash or something else.
Though the tutorial for Windows is doable, my preference is to build up everything with Linux environment.
Fortunately, I notice that NxTTool in the tutorial for Windows is really powerful. We can handle the firmware updating by using NxTTool in Linux as well!
I also refer to this Japanese Blog, which inspire me a lot.
As usual, install the required packages:
sudo apt-get install libusb-dev:i386 libusb-0.1-4 subversion fpcPlease note, here is the case for 64bits user that I change libusb-dev to libusb-dev:i386 comparing to the original tutorial.
Instead of using libnxt to do the uploading, here I follow that JP Blog to get the latest version of bricxcc: (The url in blog is not available any more.)
$svn co https://bricxcc.svn.sourceforge.net/svnroot/bricxcc/ bricxcc_newor download from here (1.0.1.0):
http://sourceforge.net/projects/bricxcc/files/bricxcc_source/bricxcc%203.3.7.19/bricxcc_src_33719.zip/download
$cd bricxcc_new
$make -f ./NeXTTool.mak
And go to /usr/bin to make an alias.
sudo ln -s ~/development/nxtOSEK/bricxcc-code/nexttool nextool
If you miss ppc386, please download it:
wget http://freefr.dl.sourceforge.net/project/freepascal/Linux/2.6.4/fpc-2.6.4.i386-linux.tar
To test your NxTTool, please use the following command:
sudo nextool /COM=usb -getname
NXT01
Then download the enhanced version of NxT firmware and store with NxTTool:
$wget http://bricxcc.sourceforge.net/lms_arm_jch.zip
To install the firmware, type the command below, where “lms_arm_nbcnxc_1xx.rfw” is the filename that you downloaded previously.
For example:
sudo nextool /COM=usb -firmware=lms_arm_nbcnxc_128.rfw
(This tool should be built in bricxcc-code.)
sudo nextool /COM=usb -versions

Protocol version = 1.124
Firmware version = 1.xx
Then now you can go back to the OSEK build tree which is mentioned in the previous article:
sudo nextool /COM=usb -download=helloworld/helloworld_OSEK.rxeAfter all, you can compile a specific OSEK example and execute:
sudo nextool /COM=usb -download=RMS.rxeThen you can use NxT standard operations to open the file and see the LOGO and example as following figures:


Comments
Post a Comment